Whether you’re planning a loft conversion or simply need a more practical way to access your loft for whatever reason, a loft ladder can help you reach it. Loft ladders are an incredibly practical invention that make climbing into a loft while carrying things all the easier. But just buying a loft ladder isn’t enough to be ready for everything – you still need to install. Here’s a quick, simple guide on how to install your loft ladder.
Table of Contents
Before you start
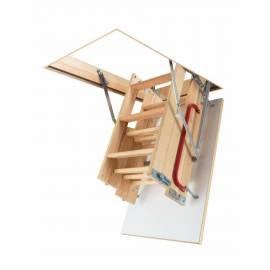
Not all loft ladders are made the same – there are folding, sliding, concertina loft ladders, and many more. While this guide should work for you regardless of your choice, it’s always better to have a type chosen beforehand, as some types come with hatches while others don’t. Additionally, always make sure you have assistance, as loft ladder installation can be quite the undertaking. In order to complete the process, you’ll need the following tools, among others:
- tape measure
- screwdriver
- hammer
- saw
- nails, screws and pins
- cordless drill
Once all that’s out of the way, it’s time to install your loft ladder!
1. Choose the location
If you don’t already have an opening or for whatever reason you need to make a new one, start with this step. Measure the distance to the external walls carefully, as you don’t want your opening to be too close to them – ensure a distance of at least one meter to avoid problems with headroom position. Aside from that, ensure that there is enough headroom in the loft when climbing through the opening.
2. Make an opening
Carefully mark the position of your opening and then make a trial hole. Make sure the position of the ceiling joists is right and make sure the new opening aligns with one of them. Cut the ceiling joists to the length of the loft ladder with an added 10cm. Check the squareness and cut off the remaining plasterboard to correct the opening size.
3. if you already have an opening, make the right adjustments to it
If you already have an opening, you might end up simply needing to adjust it a little to fit the new hatch. This usually involved enlarging the opening, which can be easily done as long as you’re precise in your measurements.
4. Placing the ladder into the opening
Make sure the ladder opens in the correct direction for ascent after it’s installed. Your assistant should help you out with this step by lifting the ladder assembly through the ceiling opening.
5. Fixing the box frame
Once you’ve positioned everything where it needs to be, you need to fix the box frame into the opening permanently. This can be achieved by drilling holes into the ends and sides of the box frame and then applying screws to fix them together, though nails can do the job as well.

Other products in category: Loft Ladders
£117.50 tax excl.
Other products in category: Loft Ladders
£125.00 tax excl.