Added natural light, excellent ventilation throughout the property, improved curb appeal, and added property value: These are just some of the advantages homeowners can expect when they install skylights.
With careful planning and consideration, any property owner can enjoy these benefits and install skylights that will truly improve the aesthetics of their property, increase their quality of life, and grow the value of their real estate. This guide will teach you everything you need to know about the process!
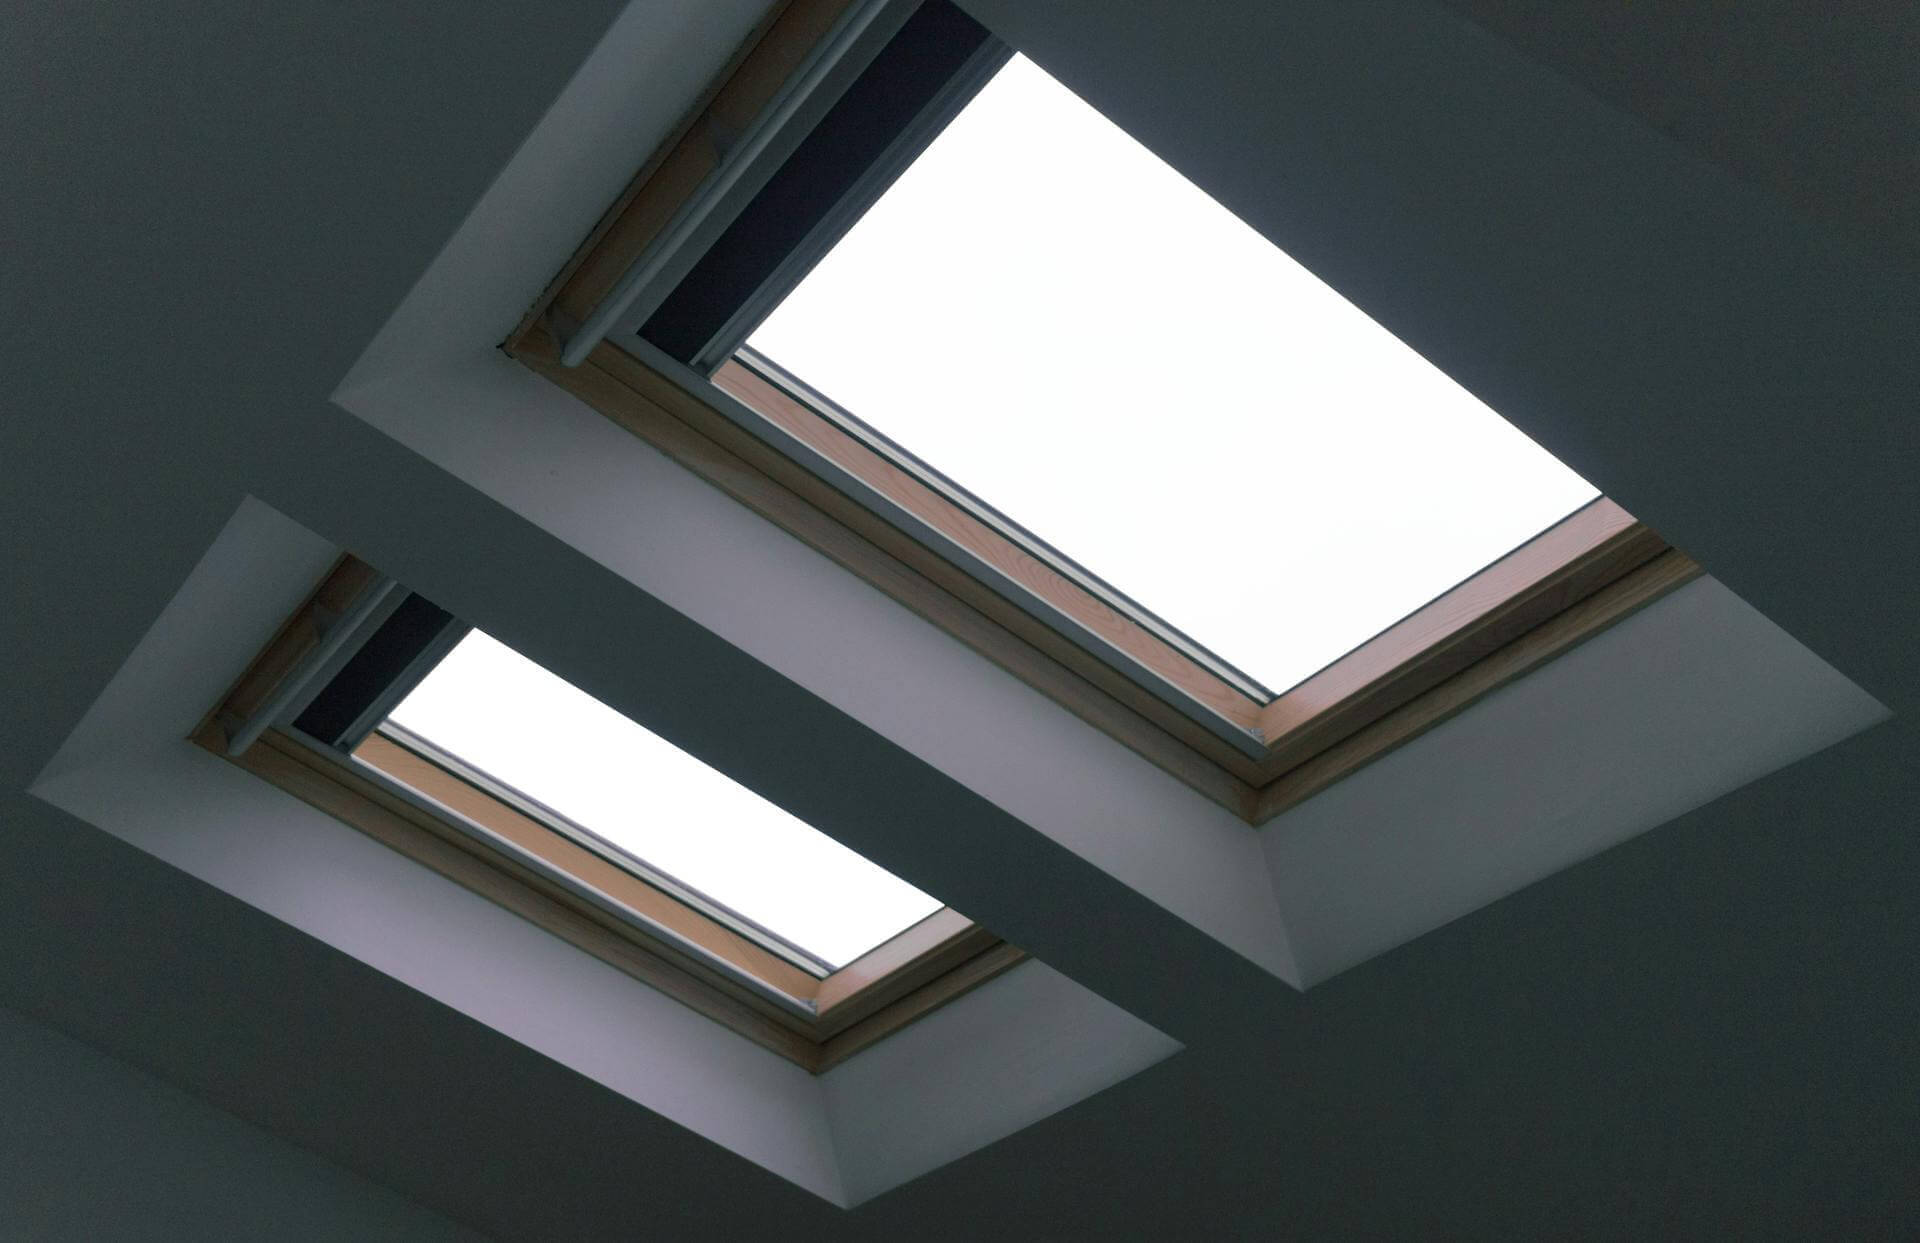
Table of Contents
Step-by-step Guide to a Skylight Installation
- Step 1: Decide on an Appropriate Location for the Skylight Window
The installation process begins with you, the property owner/designer, choosing a location for the skylight window. This is highly important since it impacts both the functionality of your window and the aesthetics of the interior.
The ideal location offers both ample natural light and great ventilation. It offers a great view from the interior and it is situated in a spot that, when the skylight is installed, doesn’t hurt the structural integrity of the property.
- Step 2: Mark and Outline the Location of the Window on Your Roof
After you choose the location, carefully measure the skylight frame and then outline the dimensions of the window on both the interior and exterior of the roof. This helps you avoid making mistakes when you cut an opening into the roof and helps you catch any mistakes or oversights when choosing the location (running afoul a rafter, for example).
- Step 3: Prepare the Roof and Cut an Opening
After careful planning and choosing the location, type, and size of the skylight, it is finally time to start the installation process. This begins by clearing the area around the location, removing the roof tiles, and transporting all the tools you need to the roof!
After that, start by cutting an opening in the roof along the lines you demarcated earlier. A circular saw is usually the best tool for this job. However, if your property has a metal roof, you need to use different tools!
- Step 4: Install the Curb Mount and Fit the Skylight Frame
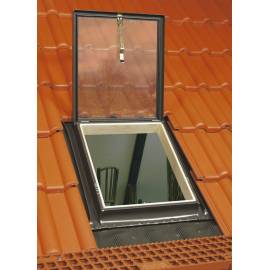
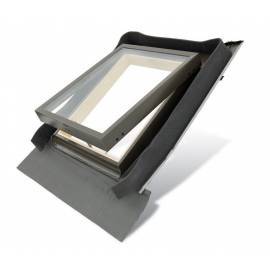
After an opening is cut, the process largely diverges depending on the type of skylight you are planning on installing. If you are planning on installing curb-mounted skylights, you first need to create the curbs, which can be a difficult process.
After you’ve laid the foundation of the skip, it is time to set up the frame. Make sure it is properly mounted and sealed. Any mistakes during this stage can have ramifications on the structure of your property in the long term.
- Step 5: Install the Skylight Window
It is finally time to install the window panes and railing. Here, make sure you are on secure footing on the roof surface to apply sufficient pressure when fitting the panes and ensuring they are secure. Be careful when handling the pane as physical impact might scratch, or worse, break it.
- Step 6: Install an Ice and Water Shield and Use the Flashing Kit
After the panes and railing have been installed, it is time to use the flashing kit (and potentially ice and water shields) to properly seal and insulate the window. Deck-mounted skylights directly face the sky, and as such, if not properly installed and sealed, heavy precipitation and storms will result in leaks and water seeping into the structure of the roof and causing irreparable damage.
At Sunlux, whether you choose our vented skylights or curb-mounted skylights, our windows come with carefully selected flashing kits to help property owners during installation.
Key Tips When Installing Skylights on a Low-slope Roof
#1 Managing Drainage Is Key to Successfully Installing Skylights on a Flat Roof
Sloped roofs provide natural drainage, which simplifies the placement, design, and installation of windows considerably. On a low-slop or flat roof, the architect or property owner needs to constantly grapple with how to facilitate drainage throughout the roof.
Without proper drainage, it is quite likely that water will pool on top of or around the skylight, which might slowly seep through and not only cause damage to the window and the roof but also cause leakage.
This, in many ways, represents the most significant challenge when installing skylight windows on a low-slope roof, and by overcoming it, you can ensure a safe and durable installation that can last years without issues or maintenance.
#2 Don’t Neglect Proper Safety Precautions During the Installation
Flat roofs are easier to navigate and traverse, and this leads to many property owners not taking the proper safety precautions when they install or repair the windows! This is extremely careless and can lead to accidents and injuries.
Before you start the installation process, make sure your footing is secure, your loft access is stable and can support the extra weight of the tools and windows, and the weather is suitable for installing skylights.
#3 You Might Need Planning Permission
The UK has strict building codes and regulations, and if you are installing curb-mounted skylights that protrude over the current height of your roof, you’ll likely need planning permission from your local council.
Additionally, your local housing association might have additional rules and restrictions that you need to adhere to before you make any substantial modifications to your home. It is always a good idea to double-check the finer print to ensure you are not running afoul of any regulations before you start installing skylights on your property!
#4 Buy High-quality Skylights
Installing new windows doesn’t only influence natural lighting and ventilation in your property, but it also permanently changes its structure and design. It is a significant decision that has long-ranging ramifications for your property.
This is why you must ensure the quality of the skylight, the skylight frame, and the flashing kits are up to your standards. Lower-quality windows are cheaper, but they easily break or leak, causing permanent damage to the structure of your home and causing you more money in maintenance fees in the long run.
Think of purchasing and installing new windows as an investment, and if you invest in a high-quality skylight that provides excellent natural light and ventilation, you’ll see a better return on investment!
Other products in category: Skylights
£91.67 tax excl.
Other products in category: RoofLITE+
£99.17 tax excl.
Important Considerations Before You Proceed With the Skylight Installation
Beyond the roof slope, there are many other factors that should come into play when you are choosing skylights for your property. Here are some of the most important ones:
#1 How to Choose the Type of Skylight?
Fixed skylights, vented skylights, curb-mounted skylights, dome skylights, pyramid skylights:
- Roofing material: Beyond the differences between a pitched roof vis-a-vis a flat roof, the actual materials the roofs are made are a huge factor in which type of windows are right for your property. A metal roof, for example, is more compatible with curb or deck-mounted windows as the structure of the roof itself is less malleable. Traditional roofs, on the other hand, likely jibe well with the classic elegance of dome skylights and appreciate more natural light these types of windows provide!
- Property needs: The windows you install should jibe with the needs of your property. Does your property need more natural light? Pyramid skylights offer all the natural lighting you need. Does your property need more ventilation? Vented skylights are a great choice.
- Preferences: Ultimately, the right skylight for your home will depend on the property owner’s preferences. You might think traditional skylights add a touch of grace to your property while another property owner might be in love with the modern look of curb-mounted skylights. There’s no one-size-fits-all solution!
- Cost: Staying within budget is essential when carrying out renovations, so when deciding on which skylight to install, take into account the skylight costs in addition to the materials and tools you’ll need to complete the task. Here at Sunlux, we offer quality skylights at highly affordable prices, making them an excellent choice for homeowners who want to stay within budget.
#2 How to Choose the Location of the Skylight?
When you install skylights, choosing the location is one of the most important decisions you’ll make as it influences every aspect of the window, specifically, and has a significant impact on both the aesthetics and functionality of your property. Here are key considerations when choosing the location:
- How much natural light does the location get?
- How does installing a window in this location impact ventilation in the property?
- To what degree does putting a skylight in this location impact the aesthetics and curb appeal of my property?
- Does the location steer clear from the rafters and other important structures in the roof?
#3 Do the Properties Feature Regular or Metal Roofs? Roof Types Matter
Though many homeowners pay attention to the location, type, and size of the skylight, there’s another key consideration that shouldn’t be neglected: What type of roofing material does your property use?
Particularly, if you own a property with a metal roof, there are special considerations you need to take into account.
- Creating an opening in metal roofs is more difficult while also being harder to reverse, so you must be certain about the location and size of the skylight you are looking to install. Deck-mounted skylights and curb-mounted skylights allow property owners
- Metal roofs are naturally susceptible to considerable thermal expansion, which can cause your skylight frame might come loose, start leaking, or crack. This is why you need to use specifically designed flashing kits tailored for metal roofs, which take into account the thermal expansion in their design.
#4 Do You Need Roof Access?
Flat roof skylights and traditional skylights serve largely similar purposes. They are excellent sources of natural light and ventilation while significantly improving the aesthetics of the interior and the property’s curb appeal.
However, they do have key differences. Convenient and easy roof access is more valuable in properties with flat roofs, since flat roofs often act as secondary storage spaces for old hardware or equipment. Larger flat-roof skylights can provide excellent roof access from the interior, which can be extremely useful.
How to Install Skylights on Low-slope Roof FAQ
Can You Install Skylights on a Flat Roof?
While skylights usually need sloped surfaces to be properly installed, it is entirely possible to install them on flat roofs. Usually, this is done by using a raised platform on top of which the skylight frame is installed. These are known as deck-mounted skylights, and they are an excellent choice for properties with a flat roof slope!
What’s the Minimum Angle When Installing a Skylight?
Traditional skylights need to be installed at an angle to ensure rainwater doesn’t pool on top or around it. The minimum angle to allow for proper drainage is usually considered 3 degrees, though depending on the type of skylight and roof, a steeper angle might be required.
Non-traditional skylights like pyramid skylights, for example, don’t have the same requirement since they feature a natural slope that makes it impossible for water to pool.
Are There Any Advantages to Installing Skylights on a Flat Roof Surface?
Although installing skylights on flat roofs requires careful planning and special considerations, it also has advantages. Flat-roof skylights provide exceptional natural lighting, better ventilation, and improved roof access. This is why skylights make for excellent roof windows regardless of the type and slope of the roof!